Wednesday, June 28, 2023

How to propagate epiphyllum cacti flowers?

Red Orchid Cactus, Epiphyllum - Pink Flowers or Flower Parts - Almost Eden

Epiphyllum, commonly known as orchid cacti or epiphytic cacti, can be propagated through stem cuttings. Here's a step-by-step guide on how to propagate Epiphyllum:

  1. Select a healthy parent plant: Choose a mature Epiphyllum plant with strong and healthy stems. Look for a plant that is actively growing and free from pests or diseases.

  2. Prepare the stem cuttings: Take stem cuttings in spring or early summer when the plant is actively growing. Select a healthy stem that is at least 4-6 inches (10-15 cm) long. Make a clean cut just below a joint or segment using a sharp, sterilized knife or scissors.

  3. Allow the cuttings to callus: Place the cuttings in a warm, dry location for a few days to allow the cut ends to callus over. This helps prevent rotting when the cuttings are planted.

  4. Prepare the rooting medium: Fill a small pot or container with a well-draining cactus or succulent potting mix. Alternatively, you can use a mix of perlite and peat moss or a mixture of sand and peat.

  5. Plant the cuttings: Make a hole in the rooting medium using a pencil or stick. Insert the bottom end of the cutting into the hole, ensuring it is planted deep enough to provide stability. Press the medium gently around the cutting to hold it in place.

  6. Provide the right environment: Place the pots or containers in a warm location with bright, indirect light. Avoid direct sunlight, as it may cause the cuttings to dry out or get sunburned. Maintain a temperature of around 70-80°F (21-27°C).

  7. Water sparingly: Water the cuttings lightly, ensuring the soil is slightly moist but not waterlogged. Overwatering can lead to rotting. Allow the top inch of the soil to dry out between waterings.

  8. Encourage root growth: Keep the humidity levels moderately high around the cuttings by placing a clear plastic bag or a propagator dome over the pots. This helps to create a mini-greenhouse effect and maintain moisture around the cuttings.

  9. Monitor and wait for root development: Check the cuttings regularly for signs of root growth, usually within a few weeks to a couple of months. Gently tug on the cuttings to feel resistance, indicating the presence of roots.

  10. Transplant the rooted cuttings: Once the cuttings have developed a sufficient root system, carefully transplant them into individual pots with a well-draining cactus or succulent potting mix. Provide regular care by watering when the soil is dry and placing the plants in bright, indirect light.

With proper care and patience, the propagated Epiphyllum cuttings should establish themselves and develop into new plants. It's important to maintain the appropriate growing conditions and avoid overwatering to prevent rotting and ensure successful propagation.


 

How to propagate mums or chrysanthemums?

 Chrysanthemums rediscovered - Floret Flowers

Mums, also known as chrysanthemums, can be propagated through several methods, including division, stem cuttings, and root cuttings. Here's a step-by-step guide on how to propagate mums using division and stem cuttings:

  1. Division:

    • Choose a healthy mum plant that has been growing for at least a year. The best time to divide mums is in early spring or early fall.
    • Carefully dig up the mum plant, trying to preserve as much of the root system as possible.
    • Gently separate the clump into smaller sections by pulling them apart or using a clean, sharp knife or garden tool. Each section should have its own set of roots and shoots.
    • Trim any damaged or rotting roots, and cut back the foliage to reduce stress on the divided plants.
    • Replant each divided section in a prepared garden bed or individual pots, ensuring the roots are properly placed and covered with soil. Space the divisions appropriately, leaving enough room for their mature size.
    • Water the newly planted divisions thoroughly and provide regular watering as needed until they become established.
  2. Stem Cuttings:

    • Select a healthy mum plant with strong stems and vibrant foliage.
    • Take stem cuttings in spring or early summer when the plant is actively growing. Cut 3-4 inch (7-10 cm) sections from the tips of healthy stems, making clean cuts just below a leaf node.
    • Remove the lower leaves from the cuttings, leaving a few sets of leaves at the top.
    • Dip the cut ends of the stems in a rooting hormone powder or gel to promote root development (optional).
    • Insert the cuttings into a well-draining potting mix or rooting medium. You can use a tray, small pots, or a propagation tray with individual cells.
    • Mist the cuttings with water and cover the tray or pots with a clear plastic bag or a plastic dome to create a humid environment.
    • Place the cuttings in a warm location with bright, indirect light. Avoid direct sunlight as it may cause excessive heat and drying out.
    • Check the moisture level of the rooting medium regularly and mist the cuttings as needed to maintain humidity.
    • After a few weeks, gently tug on the cuttings to check for resistance, indicating the presence of roots.
    • Once rooted, transplant the rooted cuttings into individual pots or a prepared garden bed. Continue to care for them by providing adequate water, sunlight, and nutrients.

Remember to provide the newly propagated mums with appropriate care, including regular watering, well-draining soil, and adequate sunlight. With proper attention, the propagated mums should establish themselves and grow into healthy plants, ready to bloom in their next season.


Tuesday, June 27, 2023

How to propagate roses?


Roses can be propagated through several methods, including stem cuttings, layering, and grafting. Here's a step-by-step guide on how to propagate roses using stem cuttings:

  1. Select a healthy parent plant: Choose a healthy rose plant that you want to propagate. Look for a plant with strong, disease-free stems and vibrant blooms.

  2. Prepare the stem cuttings: Take stem cuttings in late spring or early summer when the rose plant is actively growing. Cut a 6-8 inch (15-20 cm) section of a healthy stem that is about the thickness of a pencil. Make a clean, diagonal cut just below a leaf node (the point where a leaf is attached to the stem).

  3. Remove leaves and thorns: Strip off any leaves from the lower two-thirds of the cutting. You can also remove any thorns to prevent injuries when handling the cuttings.

  4. Apply rooting hormone (optional): Dip the bottom end of the cutting in a rooting hormone powder or gel. This can help stimulate root growth, but it is optional.

  5. Prepare the rooting medium: Fill a small container with a well-draining rooting medium, such as a mixture of perlite and peat moss or a commercial seed-starting mix. Moisten the medium slightly.

  6. Plant the cuttings: Make a hole in the rooting medium using a pencil or a stick. Insert the bottom end of the cutting into the hole, ensuring that at least two nodes are buried in the medium. Firmly press the medium around the cutting to provide stability.

  7. Provide the right environment: Place the container in a warm and humid location with indirect sunlight. You can cover the container with a clear plastic bag or a plastic dome to create a mini greenhouse effect and retain moisture.

  8. Water and monitor: Keep the rooting medium consistently moist but not waterlogged. Mist the cuttings occasionally to maintain humidity. Avoid overwatering, as it can cause rot.

  9. Wait for roots to develop: Roots should begin to form within a few weeks to a few months, depending on the rose variety. You can gently tug on the cutting to check for resistance, indicating the presence of roots.

  10. Transplant the rooted cuttings: Once the cuttings have developed a sufficient root system, transplant them into individual pots or a prepared garden bed. Continue to care for the new plants by providing adequate water, sunlight, and nutrients.

Propagation success can vary depending on the rose variety and environmental conditions. It's worth noting that some rose varieties are best propagated through other methods, such as budding or grafting, which require more specialized techniques.


How to propagate irises?


Irises can be propagated through a few different methods, including division and seed propagation. Here's a step-by-step guide on how to propagate irises:

  1. Division:

    • Choose a mature iris plant that has been growing for at least three years. The best time to divide irises is usually in late summer or early fall, after they have finished flowering.
    • Carefully dig up the iris clump, taking care not to damage the rhizomes (thick, fleshy roots).
    • Gently separate the rhizomes by hand or with a clean, sharp knife. Each division should have a healthy fan of leaves and a portion of the rhizome with roots.
    • Trim any damaged or rotting parts of the rhizomes.
    • Replant the divisions in a new location or in separate pots, making sure the rhizomes are partially exposed and the roots are properly placed and covered with soil.
    • Water the divisions thoroughly after planting and continue to provide regular watering as needed until they become established.
  2. Seed Propagation:

    • Collect ripe iris seeds from the seed pods after the flowers have faded and the pods have turned brown.
    • Soak the seeds in warm water for 24 hours to help soften the seed coat and improve germination.
    • Fill a seed tray or pots with a well-draining potting mix. Sow the iris seeds on the surface and lightly press them into the soil.
    • Keep the soil consistently moist but not waterlogged. Place the tray or pots in a warm location with indirect sunlight.
    • Germination can take several weeks to several months. Once the seedlings have grown large enough to handle, transplant them into individual pots or a nursery bed.
    • Continue to care for the seedlings by providing adequate light, water, and nutrients until they are mature enough to be transplanted into their permanent growing location.

Remember to provide the newly propagated irises with the right growing conditions, including well-draining soil, adequate sunlight, and proper watering. It may take some time for the newly divided or seed-grown irises to establish and bloom, so be patient and continue to provide them with the care they need.


How to propagate orchid?

 Orchid Care: What to Do After Orchid Blooms Fall Off? - Orchid Republic

Orchids can be propagated through various methods, including division, backbulb propagation, and keiki propagation. Here's a step-by-step guide on how to propagate orchids:

  1. Division:

    • Choose a mature orchid plant with multiple pseudobulbs and healthy roots.
    • Carefully remove the orchid from its pot and gently separate the pseudobulbs or growths, ensuring each division has at least 3-4 healthy roots and a growth or pseudobulb.
    • Trim any damaged or rotting roots and clean the divisions with a sterile knife or shears.
    • Plant each division in a separate pot or suitable growing medium, ensuring the roots are properly placed and covered.
    • Provide appropriate care, including proper watering, light, and temperature conditions, to promote root development and new growth.
  2. Backbulb Propagation:

    • Identify mature backbulbs on your orchid plant that have dormant or inactive growth.
    • Remove the backbulb from the plant and clean it by removing any dried or dead tissue.
    • Cut the backbulb into sections, ensuring each section has at least one healthy dormant bud or eye.
    • Plant each backbulb section in a suitable growing medium or pot, burying it partially and ensuring the bud or eye is facing upward.
    • Provide the necessary care, including appropriate watering and light conditions, to stimulate new growth from the dormant bud.
  3. Keiki Propagation:

    • Keikis are miniature plants that develop on the stem or aerial roots of some orchids.
    • If your orchid produces keikis, allow them to grow until they develop a few roots and leaves.
    • Once the keiki has sufficient root and leaf growth, carefully separate it from the parent plant using sterile tools.
    • Plant the keiki in a small pot or suitable growing medium, ensuring the roots are properly placed and covered.
    • Provide the necessary care, including appropriate watering and light conditions, to support the keiki's growth.

Remember to provide the newly propagated orchids with the right environmental conditions, such as proper lighting, temperature, humidity, and watering. It's also important to use sterile tools and appropriate growing mediums to minimize the risk of disease or infection. With patience and proper care, your propagated orchids should develop into healthy plants and eventually bloom.


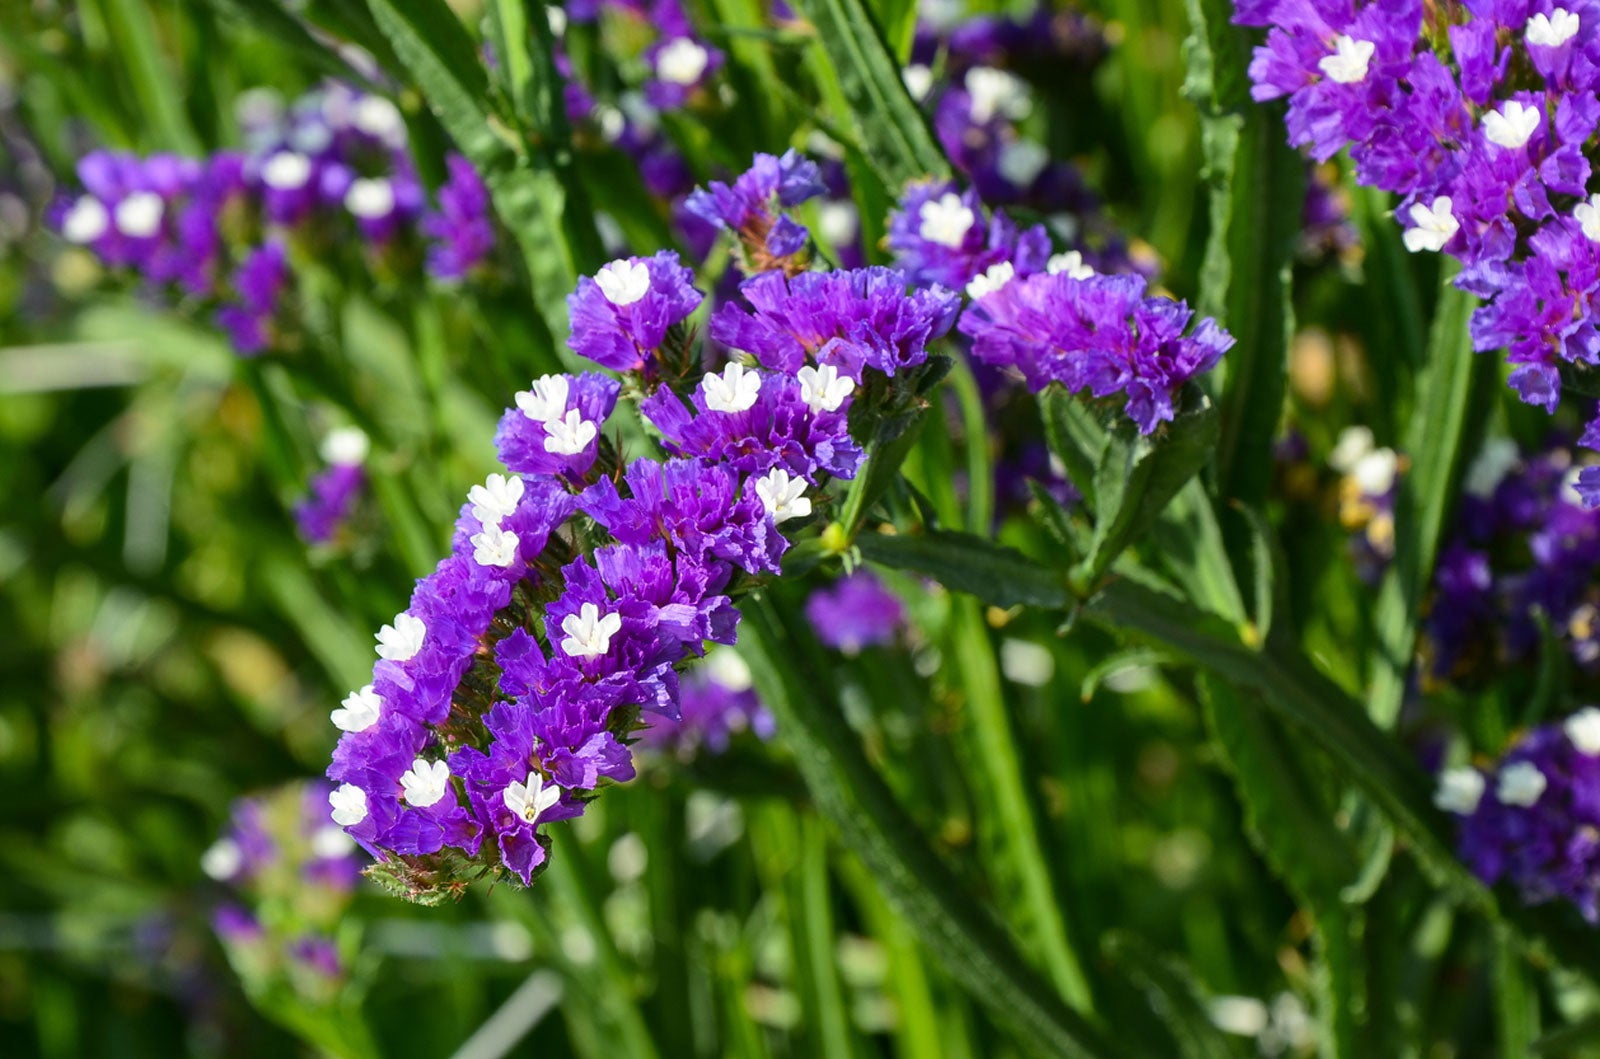
How to grow statice flower?

Statice Flowers: Growing And Using Statice As Cut Flowers

To grow statice (Limonium sinuatum), you can follow these steps:

  1. Choose the right location: Statice thrives in full sun, so select a location in your garden that receives at least 6-8 hours of direct sunlight per day. Ensure the soil is well-draining to prevent waterlogging.

  2. Prepare the soil: Statice prefers well-drained soil with a slightly acidic to neutral pH. Amend the soil with organic matter such as compost or well-rotted manure to improve its fertility and drainage.

  3. Start seeds indoors or sow directly: Statice can be started from seeds indoors 8-10 weeks before the last frost date or sown directly into the garden after the danger of frost has passed. Follow the instructions on the seed packet for specific guidance on planting depth and spacing.

  4. Transplant or thin seedlings: If you started statice seeds indoors, transplant the seedlings into the garden once they have developed a few true leaves and all danger of frost has passed. If you sowed seeds directly, thin the seedlings to provide enough space for each plant to grow.

  5. Water appropriately: While statice is drought-tolerant, it still requires regular watering to establish and grow. Water deeply when the top inch of soil feels dry, but avoid overwatering, as excessive moisture can cause root rot.

  6. Mulch and weed: Apply a layer of organic mulch around the base of the plants to help conserve moisture, suppress weed growth, and regulate soil temperature.

  7. Fertilize sparingly: Statice generally doesn't require heavy fertilization. You can apply a balanced slow-release fertilizer once or twice during the growing season, following the manufacturer's instructions.

  8. Support tall varieties: Some statice varieties can grow tall and benefit from staking or support to prevent them from falling over.

  9. Deadhead spent flowers: To encourage continuous blooming, remove faded flowers by cutting them back to the base of the stem. This will also help redirect the plant's energy into producing new blooms.

  10. Harvest and preserve: Statice flowers are often harvested for dried flower arrangements. Harvest the flowers when they are fully open but before they start to fade. Hang them upside down in a cool, dark, and well-ventilated area to dry.

With proper care and attention, your statice plants should produce beautiful clusters of colorful flowers throughout the growing season.


Monday, June 26, 2023

How to grow wisteria?

How to Grow and Care for Wisteria | Gardener's Path

Wisteria is a beautiful and vigorous flowering vine known for its cascading clusters of fragrant and colorful flowers. Here's a step-by-step guide on how to grow wisteria:

  1. Select the Right Location: Wisteria thrives in full sun, so choose a location in your garden that receives at least 6-8 hours of direct sunlight each day. Ensure that the area has well-draining soil.

  2. Prepare the Soil: Wisteria prefers fertile and slightly acidic soil with good drainage. Before planting, amend the soil with organic matter such as compost or well-rotted manure to improve fertility and drainage. If your soil is heavy or clayey, consider adding perlite or sand to improve drainage.

  3. Planting: Dig a hole that is larger than the root ball of the wisteria plant. Remove the plant from its container and place it in the hole, ensuring that the top of the root ball is level with or slightly above the surrounding soil. Backfill the hole with soil and gently firm it around the plant. Water thoroughly after planting to settle the soil.

  4. Support: Wisteria is a climbing vine that needs sturdy support for proper growth. Install a trellis, arbor, or other support structure near the plant. Wisteria has strong twining stems, so make sure the support is secure and can withstand the weight of the vine as it grows.

  5. Watering: Wisteria requires regular watering to establish and grow, especially during the first year. Water deeply once or twice a week, allowing the soil to dry out between watering sessions. Once established, wisteria is moderately drought-tolerant, but it still benefits from regular watering during dry periods.

  6. Pruning: Proper pruning is essential for shaping and encouraging flowering in wisteria. Prune wisteria twice a year: once in late winter or early spring before the buds start to swell, and again after flowering in the summer. Remove any dead, damaged, or weak branches and trim back excessive growth to maintain the desired size and shape. Regular pruning also helps promote better flowering.

  7. Fertilizing: Wisteria generally doesn't require heavy fertilization, but you can apply a balanced slow-release fertilizer in early spring to provide some nutrients. Follow the manufacturer's instructions for application rates. Avoid over-fertilization, as it can result in excessive foliage growth with fewer flowers.

  8. Protecting from Cold: Wisteria is generally hardy but can be susceptible to frost damage in colder regions. If you live in an area with freezing temperatures, consider planting wisteria against a south-facing wall to provide some protection. Mulching around the base of the plant can also help insulate the roots during cold weather.

  9. Pest and Disease Management: Wisteria is relatively pest and disease-resistant. However, it can occasionally be affected by pests like aphids, scale insects, or caterpillars. Monitor the plant regularly and take appropriate measures to control pests if necessary. Good air circulation and avoiding overhead watering can help prevent fungal diseases.

  10. Training: As the wisteria grows, gently train the long shoots along the support structure, weaving them through or tying them to the structure. This helps create a neat and attractive appearance and encourages upward growth.

With patience and proper care, wisteria can reward you with breathtaking displays of fragrant flowers. Enjoy the beauty and elegance of this stunning vine in your garden or on pergolas, arbors, or fences.


How to grow a healthy Drawf Banana plant

  The Ultimate Guide to Growing Your Own Dwarf Banana Tree 🌴 Growing a dwarf banana tree is the easiest way to bring a lush, tropical oasi...