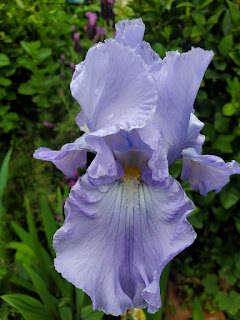
Hybridizing irises can be an exciting and rewarding process for gardeners who want to create new and unique iris varieties. Here are the general steps to hybridize irises:
Select Parent Plants: Choose two iris plants with desirable traits that you want to combine in the offspring. It's important to select healthy plants that are free from diseases or pests. Consider factors such as flower color, shape, size, fragrance, and overall plant vigor.
Timing: Hybridization is typically done when the iris plants are in bloom. It's important to have both the "pollen parent" (the plant providing the pollen) and the "pod parent" (the plant receiving the pollen) in bloom at the same time.
Preparing for Hybridization:
- Identify the parts of the iris flower: The male reproductive organ, called the stamen, produces pollen, while the female reproductive organ, called the pistil, has a structure called the stigma that receives pollen.
- Remove unwanted parts: Gently remove the petals and sepals of the flower, being careful not to damage the reproductive organs. This helps expose the stigma for pollen reception.
Pollination:
- Pollen Transfer: Take the pollen from the stamen of the pollen parent iris and transfer it to the stigma of the pod parent iris. You can use a small artist's paintbrush or a cotton swab to carefully collect pollen from the stamen and transfer it to the stigma. Alternatively, you can carefully remove the anther (the part of the stamen holding the pollen) and gently rub it against the stigma.
- Labeling: Keep track of the crosses you make by labeling the flowers with the parents' names or using a small tag or marker to identify the crosses.
Protecting the Cross:
- Cover the pollinated flower: To prevent unwanted pollination from insects or wind-blown pollen, cover the pollinated flower with a small bag made of breathable material such as tulle or nylon mesh. Secure the bag gently around the stem with a twist tie or string. This helps protect the developing seed pod from unwanted pollination.
Seed Development:
- Allow the pollinated flower to form a seed pod: After successful pollination, the flower will start developing a seed pod. This process can take several weeks. The pod will grow and eventually turn brown and dry.
- Harvesting the seeds: Once the seed pod is fully mature and dry, carefully remove it from the plant. Gently open the pod to collect the seeds. Dry the seeds further if needed and store them in a cool, dry place.
Seed Germination and Planting:
- Stratification: Some iris seeds may require a period of cold stratification to break dormancy and encourage germination. Place the seeds in a damp paper towel or seal them in a plastic bag with moist vermiculite or peat moss. Keep them in the refrigerator for several weeks before planting.
- Planting the seeds: Fill seed trays or pots with a well-draining potting mix. Plant the seeds just below the soil surface and lightly cover them. Keep the soil consistently moist but not waterlogged.
- Transplanting: Once the seedlings have grown and developed several leaves, they can be transplanted into individual pots or directly into the garden.
Remember that hybridizing irises can be a complex and time-consuming process, and not all crosses will yield desirable results. It may take several generations of selective breeding to achieve the desired traits. Enjoy the journey and have fun experimenting with different combinations to create unique iris varieties!


No comments:
Post a Comment