Monday, June 26, 2023

What is the alfalfa pellets and how does it help your plants?

Amazon.com: Alfalfa Pellets Animal Feed (Rabbits, Guinea Pig, Etc) 5lbs. by  Old Cobblers Farm : Patio, Lawn & Garden

Alfalfa pellets are a type of organic fertilizer made from dried and compressed alfalfa (Medicago sativa) plants. Alfalfa is a legume that is rich in nutrients and organic matter, making it a valuable fertilizer for plants. Here's how alfalfa pellets can help your plants:

  1. Nutrient Content: Alfalfa pellets are a good source of essential nutrients for plants. They contain nitrogen, phosphorus, potassium (N-P-K), and other micronutrients that are beneficial for plant growth and development. These nutrients promote healthy foliage, root development, and overall plant vigor.

  2. Organic Matter: Alfalfa pellets add organic matter to the soil. Organic matter improves soil structure, enhances moisture retention, and promotes nutrient-holding capacity. It also supports beneficial soil microorganisms, which contribute to nutrient cycling and overall soil health.

  3. Nitrogen Fixation: Alfalfa is a legume, which means it has the ability to fix nitrogen from the atmosphere and convert it into a usable form for plants. When alfalfa pellets are incorporated into the soil, they release nitrogen gradually, providing a sustained source of this essential nutrient for plant growth.

  4. Soil Conditioning: Alfalfa pellets help condition the soil by improving its texture, drainage, and aeration. They can help break up compacted soils and create a more favorable environment for plant roots to grow and access nutrients.

  5. Plant Health and Disease Resistance: The nutrients and organic compounds present in alfalfa pellets promote overall plant health and help increase resistance to pests and diseases. They can enhance the plant's natural defense mechanisms, leading to stronger and more resilient plants.

  6. Improved Flowering and Fruit Production: The balanced nutrient profile of alfalfa pellets, particularly the phosphorus content, supports flower formation and fruit development. Using alfalfa pellets can help stimulate abundant blooms and increase fruit yield in many plant species.

When using alfalfa pellets as a fertilizer, consider the following guidelines:

  • Application Rates: Follow the manufacturer's instructions for specific application rates. Generally, you can apply alfalfa pellets by scattering them around plants and then incorporating them into the soil. Apply a thin layer and avoid excessive application to prevent nutrient imbalances or burning.

  • Timing: Apply alfalfa pellets before planting or during the growing season to provide a continuous source of nutrients. You can also apply them as a side dressing around established plants.

  • Watering: After applying alfalfa pellets, water the soil thoroughly to help activate the nutrients and ensure their absorption by plant roots.

  • Precautions: While alfalfa pellets are generally safe and beneficial for most plants, it's important to consider the specific needs of your plants and follow proper application guidelines. Some plants may have specific nutrient requirements or may be sensitive to certain nutrients, so it's always a good idea to do some research or consult local gardening resources for specific plant recommendations.

By using alfalfa pellets as a fertilizer and following proper application practices, you can improve soil fertility, enhance plant growth, and promote overall plant health in your garden or landscape.


What is steer manure and how does it help your plants?

image-1

Steer manure, also known as cow manure, is a type of organic fertilizer derived from cow waste. It consists of the solid waste produced by cattle, including their feces and bedding materials. Steer manure is commonly used as a soil amendment and fertilizer in gardening and agriculture. Here's how it helps your plants:

  1. Nutrient Content: Steer manure is rich in organic matter and nutrients that are beneficial for plant growth. It contains essential elements like nitrogen, phosphorus, and potassium (N-P-K), which are vital for plant development. These nutrients support healthy foliage, root growth, and the production of flowers or fruit.

  2. Organic Matter: Steer manure adds organic matter to the soil, improving its structure and fertility. It enhances moisture retention in sandy soils and promotes better drainage in heavy clay soils. The organic matter in steer manure also provides a food source for beneficial soil microorganisms, improving soil health and nutrient cycling.

  3. Nutrient Release: Steer manure releases nutrients slowly over time, providing a steady supply to plants. This slow-release characteristic helps prevent nutrient leaching and ensures that plants receive a consistent source of nutrition for sustained growth.

  4. Soil Conditioning: Incorporating steer manure into the soil helps condition it. It improves soil texture, increases water-holding capacity, and enhances nutrient availability. Steer manure also helps break up compacted soil, allowing better root penetration and air circulation.

  5. pH Adjustment: Steer manure can help adjust soil pH, especially in acidic soils. As the manure decomposes, it releases organic acids that can help neutralize excessively alkaline soils and create a more favorable pH range for plant growth.

When using steer manure as a fertilizer, consider the following guidelines:

  • Composting: Fresh steer manure is high in nitrogen and can be too strong for direct application to plants. Composting the manure for several (six months) months helps stabilize the nutrient content, break down pathogens, and reduce the risk of burning plants.

  • Application Rates: Apply composted steer manure to the soil at a rate of about 1-2 inches (2.5-5 cm) and mix it into the top few inches of soil. Alternatively, you can use it as a side dressing around plants during the growing season.

  • Timing: Apply steer manure before planting or during the growing season to provide nutrients to plants when they need them most.

  • Precautions: Use well-composted steer manure to minimize the risk of pathogens. Avoid direct contact between fresh manure and edible crops that are consumed raw. Wash any vegetables or fruits thoroughly before consuming.

By using steer manure as a soil amendment and following proper application techniques, you can improve soil fertility, enhance plant growth, and promote a healthier garden or landscape.


What is chicken manure and how does it help your plants grow?

 Gardeners Soil Amendments #3214

Chicken manure is the waste produced by chickens, primarily in the form of their droppings. It is a rich and organic fertilizer that provides several benefits to plants when used properly. Here's how chicken manure helps plants grow:

  1. Nutrient-Rich: Chicken manure is a valuable source of nutrients for plants. It contains high levels of nitrogen, phosphorus, and potassium (N-P-K), which are essential for plant growth and development. These nutrients promote healthy foliage, strong root development, and vibrant blooms or fruit production.

  2. Organic Matter: Chicken manure is rich in organic matter, which improves soil structure and fertility. When incorporated into the soil, it enhances its ability to retain moisture, improves drainage in heavy soils, and increases nutrient-holding capacity.

  3. Microbial Activity: Chicken manure supports the growth of beneficial soil microorganisms. These microorganisms break down organic matter and release nutrients in a form that plants can easily absorb. They also contribute to the overall health of the soil ecosystem.

  4. Soil Conditioning: The addition of chicken manure helps condition the soil over time. It can help loosen compacted soils, improve aeration, and enhance the soil's ability to retain and release nutrients. This creates a favorable environment for plant roots to grow and access nutrients.

  5. Slow Release of Nutrients: Chicken manure provides a slow and steady release of nutrients to plants over time. This gradual release helps prevent nutrient leaching and ensures a consistent supply of nutrients for sustained plant growth.

When using chicken manure as a fertilizer, it is important to consider the following guidelines:

  • Composting: Fresh chicken manure is high in nitrogen and can be too potent for direct application to plants. Composting the manure for several (six months) months helps break it down, reduce odor, and stabilize the nutrient content.

  • Application Rates: Apply chicken manure sparingly to avoid over fertilization. The exact application rate depends on the specific needs of your plants and the quality of the manure. It is recommended to mix composted chicken manure into the soil at a rate of about 1-2 inches (2.5-5 cm) or use it as a side dressing around plants.

  • Timing: Apply chicken manure during the growing season or prior to planting to ensure that plants can access the nutrients when they need them most.

  • Precautions: Chicken manure should be properly composted or aged before use to eliminate harmful pathogens. Fresh chicken manure should not be used on edible crops that are consumed raw or on plants that are sensitive to high nitrogen levels.

By using chicken manure as a fertilizer and following proper application techniques, you can improve soil fertility, promote healthy plant growth, and enhance overall garden productivity.


Wednesday, June 21, 2023

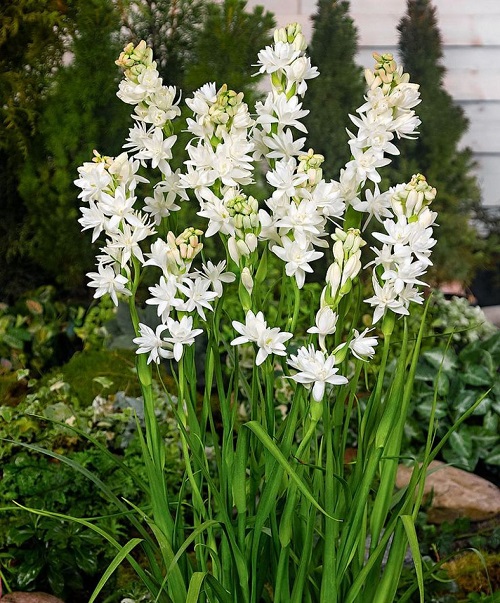
How to grow tuberoses?

 How to Grow Rajnigandha in India | Growing Tuberose • India Gardening

Tuberoses (Polianthes tuberosa) are beautiful, highly fragrant flowers known for their long-lasting blooms. Here's a guide on how to grow tuberoses:

  1. Selecting Bulbs:

    • Purchase tuberose bulbs from a reputable source or garden center. Look for large, firm bulbs that are free from signs of damage or decay.
  2. Planting Time:

    • Plant tuberose bulbs in the spring after the danger of frost has passed, typically when soil temperatures reach around 60°F (15°C).
    • If you live in a region with a warm climate, you can also plant tuberoses in the fall for winter bloom.
  3. Choosing a Location:

    • Select a sunny location for planting tuberoses. They prefer full sun, receiving at least 6 to 8 hours of direct sunlight each day.
    • Ensure the soil is well-draining, as tuberoses do not tolerate waterlogged conditions.
  4. Soil Preparation:

    • Prepare the soil by removing any weeds, rocks, or debris from the planting area.
    • Loosen the soil to a depth of 8 to 10 inches (20 to 25 cm) using a garden fork or tiller.
    • Incorporate organic matter, such as compost or well-rotted manure, into the soil to improve its structure and fertility.
  5. Planting Depth and Spacing:

    • Dig holes that are about 4 to 6 inches (10 to 15 cm) deep and space them 6 to 8 inches (15 to 20 cm) apart.
    • Place the tuberose bulbs in the holes with the pointed end facing up and the root end facing down.
    • Backfill the holes with soil, gently firming it around the bulbs.
  6. Watering:

    • After planting, water the bulbs thoroughly to settle the soil and initiate root growth.
    • Provide regular watering throughout the growing season, keeping the soil evenly moist but not waterlogged.
    • During dry spells, water deeply to ensure the roots have adequate moisture.
  7. Support:

    • As the tuberose plants grow, they may benefit from staking or support to prevent bending or falling over. Place stakes or install a support structure near the plants and tie the stems gently for support.
  8. Fertilization:

    • Apply a balanced fertilizer, such as a slow-release granular fertilizer, when planting tuberose bulbs.
    • For established plants, apply a balanced fertilizer every 4 to 6 weeks during the growing season, following the manufacturer's instructions.
  9. Mulching:

    • Apply a layer of organic mulch, such as straw or wood chips, around the tuberose plants. Mulching helps conserve moisture, suppress weed growth, and regulate soil temperature.
  10. Maintenance:

  • Remove any weeds or competing plants around the tuberoses to reduce competition for nutrients and water.
  • Deadhead faded flowers regularly to promote continuous blooming and prevent the plant from directing energy towards seed production.
  • In areas with cold winters, tuberose bulbs can be lifted and stored in a cool, dry place for winter.

With proper care and attention, tuberoses will reward you with their exquisite fragrance and elegant blooms. Enjoy the beauty and scent of these lovely flowers in your garden or containers.


How to grow hyacinth?

 Hyacinth Woodstock | DutchGrown™ | Top Size Hyacinth Bulbs

Hyacinths (Hyacinthus) are beautiful flowering bulbs that produce fragrant clusters of flowers in various colors. Here's a guide on how to grow hyacinths:

  1. Selecting Bulbs:

    • Choose healthy, firm bulbs with no signs of damage or mold. Larger bulbs tend to produce larger and more robust flowers.
    • Select bulbs that are specifically labeled for spring planting, as hyacinths have different planting times depending on your region.
  2. Planting Time:

    • Plant hyacinth bulbs in the fall, typically around September to October in most regions. This allows them to establish roots before winter and bloom in the spring.
    • If you're in a region with mild winters, you can also plant hyacinth bulbs in late winter or early spring.
  3. Choosing a Location:

    • Hyacinths prefer a location with full sun to partial shade, receiving at least 6 hours of direct sunlight each day.
    • Ensure the soil is well-draining to prevent waterlogging, as hyacinths don't tolerate wet feet.
  4. Soil Preparation:

    • Hyacinths prefer fertile, well-draining soil. Amend heavy clay or sandy soil with organic matter, such as compost or well-rotted manure, to improve soil structure and nutrient content.
    • Ensure the soil pH is slightly acidic to neutral, around 6.0 to 7.0.
  5. Planting Depth and Spacing:

    • Dig a hole that is approximately 4 to 6 inches (10 to 15 cm) deep and wide enough to accommodate the bulb.
    • Place the bulb in the hole with the pointed end facing upward. The top of the bulb should be just below the soil surface.
    • Space the bulbs about 4 to 6 inches (10 to 15 cm) apart to allow room for growth.
  6. Watering:

    • After planting, thoroughly water the bulbs to settle the soil and initiate root growth.
    • Throughout the growing season, provide regular watering to keep the soil slightly moist but not soggy. Avoid overwatering, as it can lead to bulb rot.
  7. Fertilization:

    • Before planting, incorporate a balanced bulb fertilizer into the soil according to the manufacturer's instructions.
    • In subsequent years, apply a slow-release fertilizer or a bulb-specific fertilizer in early spring when new growth emerges.
  8. Mulching:

    • Apply a layer of mulch, such as straw or wood chips, around the planted area. Mulching helps conserve moisture, suppress weed growth, and regulate soil temperature.
  9. Winter Care:

    • In regions with cold winters, hyacinth bulbs can be left in the ground throughout the winter.
    • Mulch the planted area with a layer of straw or leaves to protect the bulbs from extreme cold temperatures.
    • In areas with mild winters, hyacinth bulbs can be lifted and stored in a cool, dry place until the next planting season.
  10. Maintenance:

  • Remove spent flowers as they fade to prevent the plant from expending energy on seed production.
  • After blooming is finished and the foliage has turned yellow, you can trim it back to the ground. This allows the plant to focus its energy on storing nutrients in the bulb for the next season.

By following these guidelines, you can enjoy the vibrant and fragrant blooms of hyacinths in your garden or containers. With proper care, hyacinths will reward you with their delightful fragrance and colorful flowers each spring.


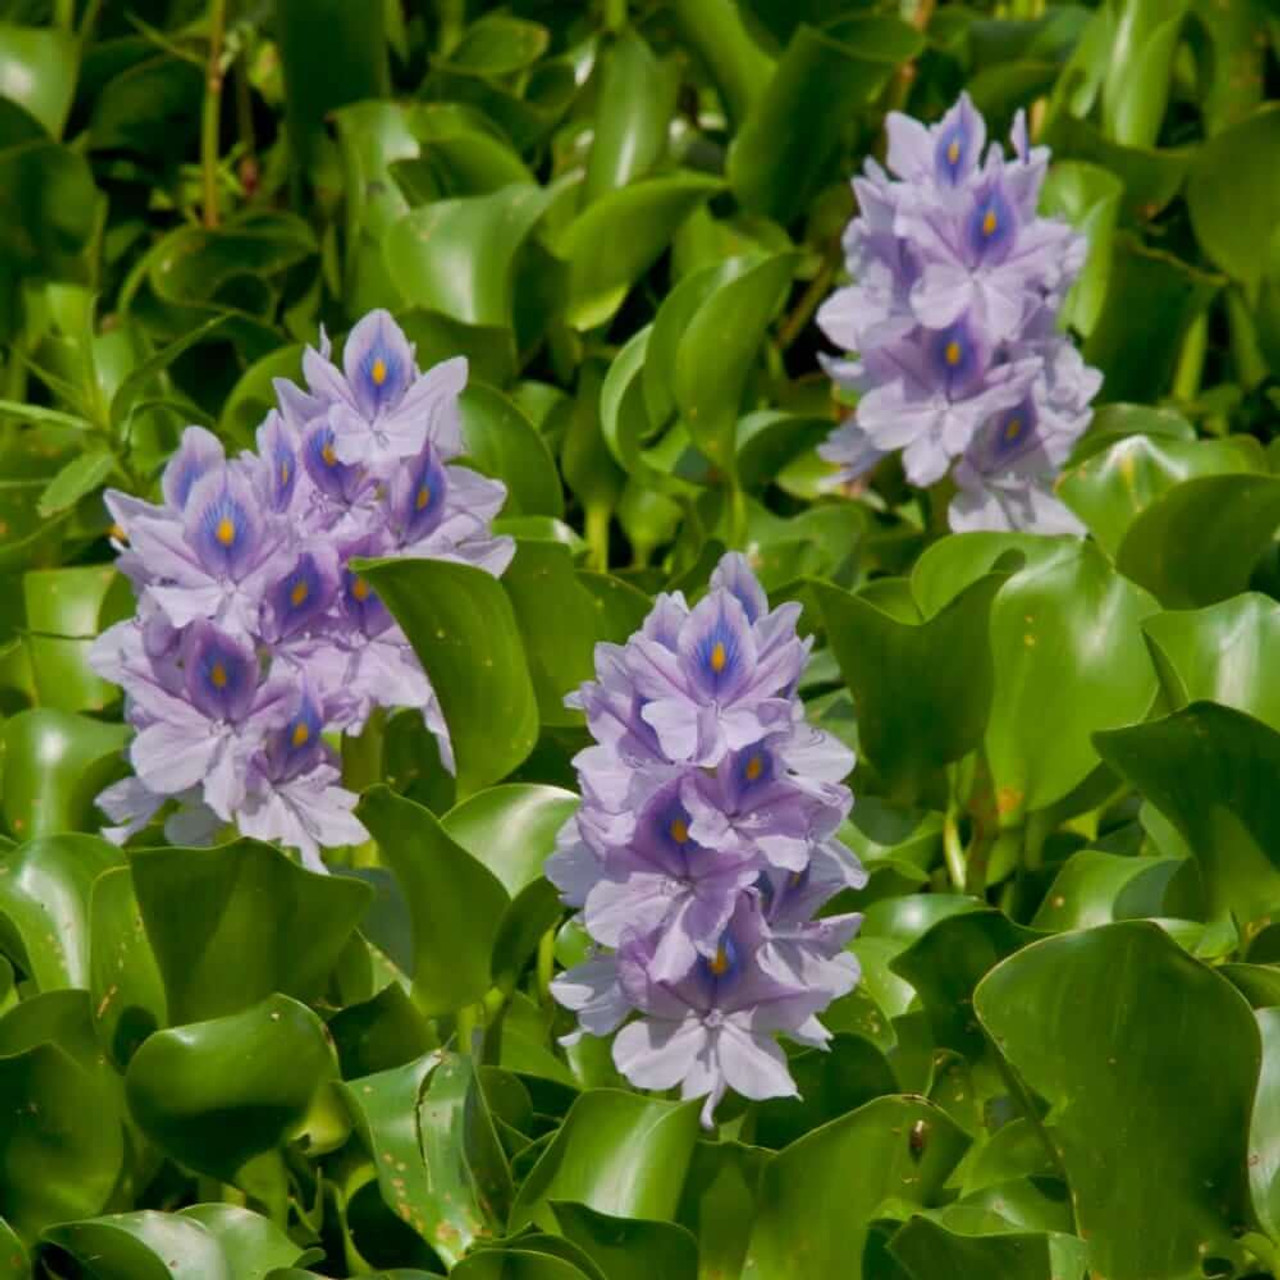
How to grow water hyacinth?

Water Hyacinth | Water Plants for Ponds | The Pond Guy

Water hyacinth (Eichhornia crassipes) is a floating aquatic plant known for its attractive foliage and beautiful lavender flowers. Here are the steps to grow water hyacinth:

  1. Choose the Right Growing Conditions: Water hyacinth thrives in warm climates with temperatures between 65-86°F (18-30°C). It prefers still or slow-moving water, such as ponds, lakes, or containers with standing water. Ensure that the water is not too deep, ideally around 1-2 feet deep.

  2. Acquire Water Hyacinth: Obtain water hyacinth plants from a reputable source, such as a local nursery or aquatic plant supplier. It's important to ensure that the plants are free of pests and diseases.

  3. Planting:

    • Release the Plants: Gently release the water hyacinth plants into the water, allowing them to float freely on the surface.
    • Spacing: Space the plants at least a foot apart to provide enough room for growth and prevent overcrowding.
  4. Provide Adequate Sunlight: Water hyacinth requires full sun to thrive and produce abundant flowers. Make sure the planting area receives at least 6 hours of direct sunlight per day. Insufficient light may result in weaker growth and fewer flowers.

  5. Monitor and Adjust Water Depth: Regularly monitor the water depth to ensure that it remains within the preferred range for water hyacinth. Adjust the water level as needed to maintain the optimal depth of 1-2 feet.

  6. Nutrient Management: Water hyacinth is known for its ability to absorb excess nutrients from the water, which can help improve water quality. However, if you notice excessive algae growth or poor plant health, it may indicate an imbalance of nutrients. Consider testing the water quality and adjusting nutrient levels accordingly.

  7. Water Quality: Water hyacinth requires clean, unpolluted water to thrive. Avoid planting water hyacinth in water bodies that are contaminated with pollutants, chemicals, or heavy metals.

  8. Cold Protection: In regions with freezing temperatures, water hyacinth is sensitive to cold. If you experience freezing conditions, you may need to protect the plants by moving them indoors or to a heated area.

  9. Maintenance:

    • Removal of Excess Growth: Regularly remove any excessive growth of water hyacinth to prevent overcrowding and maintain a healthy balance in the water body.
    • Pruning: Trim any dead or yellowing leaves or flowers to keep the plants tidy and promote healthier growth.
    • Pest Control: Monitor for any pests or diseases that may affect the water hyacinth. If necessary, use appropriate organic or aquatic-safe pest control methods.
  10. Legal Considerations: Before introducing water hyacinth to natural water bodies, ensure that it is legal and permitted in your area. In some regions, water hyacinth is considered an invasive species and may be restricted or prohibited.

Water hyacinth is a beautiful and beneficial plant for ponds and aquatic environments. With proper care and attention to water quality and maintenance, you can enjoy the stunning foliage and lavender flowers of water hyacinth in your water garden.


How to get orchid to bloom?


Getting orchids to bloom can sometimes be a bit challenging, but with proper care and attention, you can encourage your orchids to bloom. Here are some tips to help your orchids bloom:

  1. Provide Adequate Light: Orchids generally require bright but indirect light to bloom. Place your orchids in a location where they receive filtered or dappled sunlight, such as near an east or west-facing window. Avoid placing them in direct sunlight, as it can scorch the leaves.

  2. Maintain the Right Temperature: Different orchid species have different temperature preferences, so it's important to know the specific needs of your orchid. Most orchids prefer daytime temperatures between 65-80°F (18-27°C) and nighttime temperatures around 60-65°F (15-18°C). Orchids often need a temperature drop at night to initiate blooming.

  3. Provide Adequate Humidity: Orchids thrive in environments with moderate to high humidity. To increase humidity around your orchids, you can place a tray filled with water and pebbles beneath the plants or use a humidifier. Misting the leaves occasionally can also help.

  4. Water Properly: Orchids have specific watering needs, and overwatering or underwatering can inhibit blooming. Most orchids prefer to dry out slightly between waterings. Water your orchids thoroughly, allowing water to drain freely from the pot, and then wait until the potting medium is almost dry before watering again.

  5. Fertilize Regularly: Orchids require regular fertilization to promote healthy growth and blooming. Use a balanced orchid fertilizer and follow the instructions on the package for dilution and frequency. Generally, it's recommended to fertilize every 2-4 weeks during the growing season and reduce or stop fertilization during the rest period.

  6. Provide Proper Air Circulation: Good air circulation around your orchids is important for preventing fungal and bacterial diseases. Ensure there is adequate airflow in the growing area, but avoid placing orchids in drafty locations.

  7. Repot When Necessary: Orchids may need to be repotted periodically when the potting medium breaks down or becomes compacted. Repotting can help refresh the orchid's root system and promote blooming. Use a well-draining orchid potting mix when repotting.

  8. Patience and Time: Orchids often have specific blooming cycles and may take some time to adjust to their new environment or recover from stress before they bloom. Be patient and continue to provide proper care, and your orchids will reward you with beautiful blooms.

Remember, different orchid species have specific care requirements, so it's important to research and understand the needs of your particular orchid. With consistent care, proper light, temperature, humidity, and watering, you can encourage your orchids to bloom and enjoy their stunning flowers.


How to grow a healthy Drawf Banana plant

  The Ultimate Guide to Growing Your Own Dwarf Banana Tree 🌴 Growing a dwarf banana tree is the easiest way to bring a lush, tropical oasi...